
Homemade Ghee from Cream/Homemade Ghee from Scratch


For the 3rd day of blogging marathon#37,I am sharing how to get the butter from the fresh cream and melting the butter to ghee.I always use the homemade ghee only as we like the flavor and freshness of it.I used to get the butter from store and melted it till 2 years back.But one day when I had lot of leftover heavy whipping cream I decided to make the butter.The ghee got from the fresh butter was so flavorful,since then I started using the fresh cream to get the ghee.Lets move on to the recipe.............................


Basic Information

Preparation Time 20-25 minutes
Cooking Time 20 minutes
Makes around 150 ml of ghee


Ingredient

All you need is Heavy Whipping Cream (I used 500 ml)

Other Things

A big Bowl
Electric Hand Blender
A Pan to melt the Butter
Strainer
Glass jar or container to store


Method

Keep the electric blender whisk in the freezer for 10-15 minutes.Now pour in the heavy whipping cream in the bowl and start beating in a medium speed.After couple of minutes it looks creamy,continue beating again another couple of minutes it reaches a stiff peak consistency.


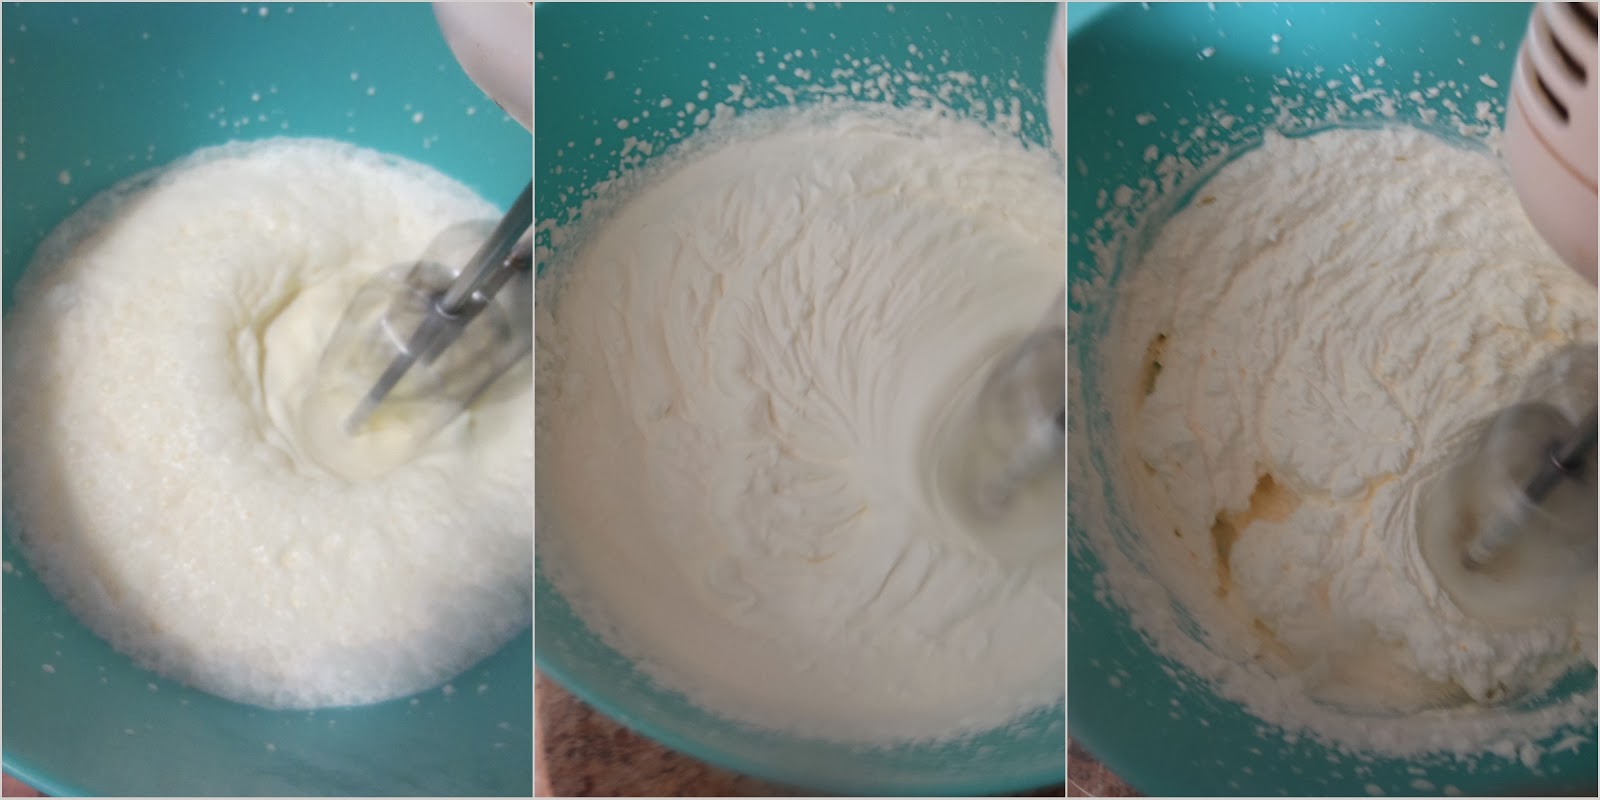
Continue beating the process for next 10 minutes,the creamy mixture looks like curdled.In another 2-3 minutes you will see some buttermilk.


Now slowly reduce the speed to low and beat it for a minute,the butter will be separated from the buttermilk and float.Now with the hand take out the butter and put in a bowl of water.


Heat a pan in a medium flame add the butter to it,the butter starts melting.After the butter melts completely foam starts up coming.


After 3-4 minutes the foam clears up and it will be in pale yellow color.Now reduce the heat to low and continue after 4-5 minutes the pale yellow color changes to a light brown color and the milk solids settled in the bottom.At this stage turn off the fire and keep it aside for 5 minutes.Now strain the ghee.


Store it in a glass jar.


.Enjoy................................................................


  • With the residue my mom adds sugar and mix which can be eaten with idly.
  • Usually we add a sprig of curry leaves or drumstick leaves before switch off the flame.
  • Use a clean dry spoon to take out the ghee and no need of refrigeration.
  • If you live in a warmer place,keep the cream bowl in a container filled with ice and beat it with the blender.   

Sumber http://www.naliniscooking.com

Comments

Popular posts from this blog

Dosa Carnival -Recap

Last month we had a group of bloggers participate in a mega marathon in Blogging Marathon edition with an interesting theme.                       1.Cook one ingredient for 26 days or one category for 26 days                       2.Cook with one ingredient for each week or category for each week I chose to share dosa varieties as one category for 26 days with sub themes for each week.I combined both the themes and sharing the recipes. Week 1 - Colorful Dosa Day 1 -  Kanchipuram Dosa /Kancheepuram Dosa Day 2 -  Karivepillai/Curry leaves Dosa Day - 3  Carrot Dosa/Carrot Dosai Week 2 - Fermented Dosa Varieties Day - 4  Cone Dosa and ghee roast Day -5  Chola Dosai/Sorghum Dosa Day -6  Atukulu Dosa/aval Dosai Day - 7  Kal Dosai Day -8  Kuthiraivali/B...

Masoor Dhal Masal Vadai

For this month cooking secretly,I am paired up with Sangee Vijay of  Spicy Treats .She gave me masoor dhal and mint as secret ingredients and used both them.For the first time I tried masal vadai using masoor dhal along with split yellow peas.The vadai came out so crispy and delicious,lets move on to the recipe.............................. Masoor Dhal Masal Vadai      Basic Information    Soaking time 2-3 hours    Preparation time 15 minutes    Cooking time 15-20 minutes    Makes  12 vadais          Ingredients Ingredient Quantity Masoor Dhal 1/2 cup Split peas/pattani paruppu 2 tbs Green chilly/pachamilagai 2 Red chilly /varamilagai 1 Ginger/inji 1 inch Garlic/poondu 2 cloves Onion(finely chopped) 1(big size) Curry leaves/karivepillai 1 sprig (chopped) Coriander leaves 2-3 tb...

Vegetable Biriyani - Pressure Cooker Method

Coming to day 3 of Blogging Marathon#62 under the theme quick dishes I am sharing a one pot meal.This biriyani can be made in 30 minutes if the veggies are chopped and kept or even frozen veggies can also be used. As I have the habit of chopping veggies for the next day cooking this takes only 20-25 minutes of cooking.Also I use the boiling hot water to cook the rice faster.When the rice is cooking in the pressure cooker you can make either a simple raita or an egg omelette to pair up with this biriyani.                                                                                                                                  ...